- Products
- Products
- Companies
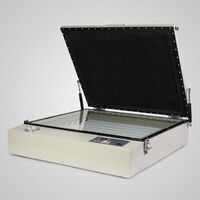
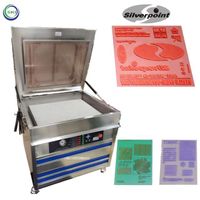
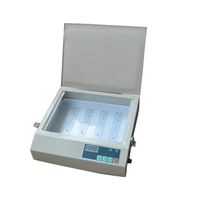
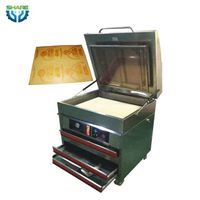
screen printing exposure unit,uv exposure unit,exposure unit with vacuum

-
Supplier: Shanghai Sihao Machinery Equipment Co., Ltd. -
Region: Shanghai, China -
Contact: Ms Sihao Sihao -
Price: $173.00 /set -
Min. Order: 1 set
| Automatic Grade: | Automatic; | Payment Terms: | L/C,D/A,D/P,T/T,Western Union,MoneyGram,PAYPAL; |
| Color: | White; | Certification: | CE Certificate; |
| Voltage: | 110V/220V; | Condition: | New; |
| Power(W): | 160w; | Voltage: | 110V/220V; |
| Product: | uv printing; | Weight: | 23kg; |
| Packaging Detail: | Carctons; | Type: | Image Setter; |
| Place of Origin: | CHINA; | Dimension(L*W*H): | 30"X28"X7"; |
| Weight: | 51Lb / 23kg; | Warranty: | 2 years; |
| Supply Ability: | 500 Set/Sets per Month; | Name: | screen printing exposure unit; |
| Brand Name: | VEVOR; | Port: | SHANGHAI; |
| After-sales Service Provided: | Online support; |
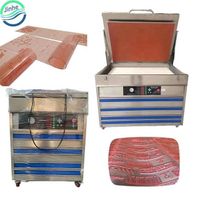
Our Precise Vacuum UV Exposure Unit is equipped with special UV lamps and auxiliary vacuum suction device. After putting the screens and well printed transparency film on the glass, close its cover and let it work after set the needed vacuum and exposure time, then it will make the screens and transparency film close on the glass tightly by evacuating the air of the vacuum chamber emerging from the rubber blanket. When the set time is up, it will deflate automatically, then the exposure is finished. Please cut off the power supply.
It has the same exposure effect with the exposure unit exposed of iodine gallium light. Even if its exposing time is a little longer, but because of its small volume, light weight, low cost and easy transporation, which is much fit for small business and family workshop for making screens with high precision.
Working Principle
Screen printing screens are coated with a light sensitive emulsion using a scoop coater. When the emulsion is dry, place a positive print of your image on the screen. Once you burn the screen, the emulsion that did not get any UV will wash out of the screen exposing the tiny pin holes. The surrounding areas that were exposed to UV will be cured. Hence the ink will pass through screen onto your substrate.


Operation Instructions
1.Connect the power supply;
2. Turn on the switch of "POWER";
3. Set the vacuum pumping time1) Press "VACUUM", the left indicator light (yellow) is lit up;
Press " + " or " – " in the "TIME CONTROL" area to set the vacuum pumping time according to your needs.(For first-time users, please put an empty screen in the middle of the rubber inner cavity, just set 40 seconds for test; if the pointer of the vacuum gauge could reach or pass the middle of the green area, that's ok. If not, please extend the time and test again until having reached the requirment.)
4. Set the exposure time:
1) Press "EXPOSURE", the left indicator light(red) is lit up;
2) Press " + " or " – " in the "TIME CONTROL" area to set the exposure time according to your needs. (Exposure time varies according to the coated photosensitive emulsion. Please just set 300 seconds for test and then reset a suitable time according to the exposure effect.)
5. Once finished the above settings, you could start exposure just as follows:
1) Put the screens coated with photosensitive emulsion and the printed transparency film on the glass.
2) Put the air suction pipe in to the screen;
3) Close the cover and click the "START" button, then it will vacuum pump and expose automatically according to the settings;
4) When the set time is up, it will deflate automatically; Open the cover and exposure is finished. Please just cut off the power supply.
6. Functions of other keys:
1) "RESET" for cancelling the previous settings: if you want to reset the vacuum / exposure time, just press "VACUUM" / "EXPOSURE" and the left indicator light is lit up; Then press "RESET" and the original settings will turn to " 0 "; Next, you could set according to your needs.
2) "BACK" for stop working: if you want to stop vacuum pumping or exposure, just press the "BACK" button, that's Ok.


-
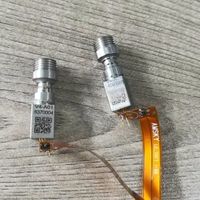
Amsky U864 UV CTCP V3 V4 Laser Diode Spare Parts

-
Photopolymer flexo resin plate washing machine for offset printing Flexographic rubber plate making machine
-
Solvent-based flexo plate-setter Offset plate-setter
-
LED machine for displaying mini polymer plates
-
New Kodak ctp machine price in 2022
-
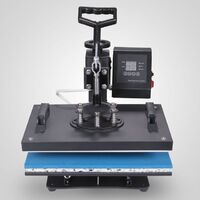
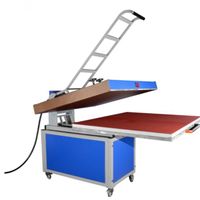
Hot sale heating plate 70x100 80*100cm double large format manual heat press sublimation shirt printing machine
-
CTP Goods Manufacturer Wholesale New UV CTP 405nm 200mW Laser Diode v1 v3 v4 v6 v8 from China
-
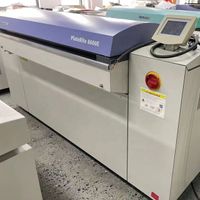
SCREEN 8000II 8600E 8600SL 8600MII 4600N 8900 Used CTP Machine
-
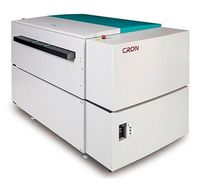
Second-hand computer plate-making machine CTP CTCP machine
-
Photosensitive resin digital flexo plate making machine flexo plate making machine
Other Products
-
$224.00 - $239.00 / set
-
$526.90 - $548.90 / set
-
$220.00 - $260.00 / set
-
$135.00 - $145.00 / set
-
$285.00 / set
-
$220.00 / set
-
$1950.00 / set
-
$1950.00 / set
-
$499.00 / set
-
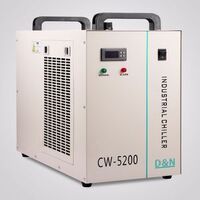
Industrial Water Chiller for CNC/ Laser Engraver Cooling Machine CW-5200DG Hot water cooling chiller$450.00 / set