- Products
- Products
- Companies
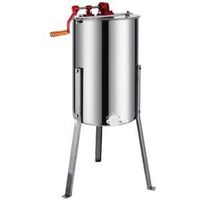
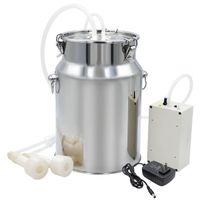
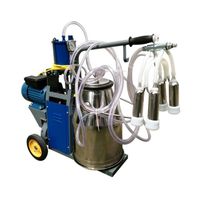
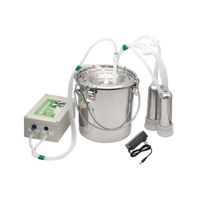
For sale milking machine / portable electric milking machine with a cow with the best quality

-
Supplier: Shanghai Sihao Machinery Equipment Co., Ltd. -
Region: Shanghai, China -
Contact: Ms selling VEVOR -
Price: $210.00 / 1 - 4 sets
$199.00 / >=5 sets -
Min. Order: 1 set
| After-sales service provided: | Engineers can repair machinery overseas | Warranty: | 1 year |
| brand: | VEVOR milking machine | Core components: | other |
| After Warranty Service: | Online support | Health status: | new |
| weight: | 65kg | Name: | milking machine |
| payment terms: | L/C,D/P,D/A,T/T | Voltage: | 220V |
| type: | milking equipment | Core Components Warranty: | 1 year |
| Applicable industries: | Manufacturing, Retail, Grocery, Food and Beverage Stores | Showroom location: | not any |
| Marketing Type: | normal product | use: | goat milking machine |
| Packaging Details: | Carton. | usage: | Portable Milking Machine |
| Dimensions (L*W*H): | 80*34*83cm | Main selling point: | high productivity |
| Mechanical test report: | if | Video external inspection: | if |
| product name: | milking machine | Certification: | CE ISO:9001 |
| place of origin; place of origin: | China Shanghai |
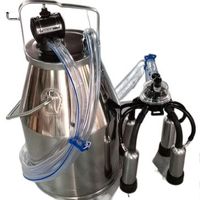
Milking Machines / Best Quality Portable Electric Single Cow Milking Machines For Sale
Please note that this machine can only be used for milking.

Switching from hand to machine milking has many benefits, including improved regular milking speed and better milking results. A good routine throughout lactation can help reduce stress on the herd. This helps to improve milk quality and increase milk production.
thiselectric milking machineThe structure is simple, the auxiliary power is small, the operation and maintenance are convenient, and it is used for milking small breeders.
In order to improve hygiene standards, improve the milk quality of cows, and prevent mastitis in cows, milking workers must master certain mechanical knowledge and know how to use the milking machine correctly. Therefore, it is more helpful for the milking union to read this instruction carefully.

Use of the milking machine:
- Before operating the milking machine, check that the power supply voltage meets the requirements of the milking cart
- After the milk machine is running, idle for 3-5 minutes. There is no blockage and abnormal noise between the moving parts. Then convert to clusters, i.e. the connection inlets of the paws are all up and the nipple inlets are up. After one minute, the pointer of the vacuum gauge should reach 0.04-0.045MPa. Adjust the inlet value on the jaws when the vacuum is too high or too low. Milking can not be started until the long and short gap between the steel ball and the compression spring reaches 0.04-0.45MPa.
- Wipe and massage nipples with warm water before milking. Then milk the milk one by one by hand, squirting 2-3 times. After confirming that there is no mastitis, the teat cup can be fitted into the milk. As shown in Figure 5 and Figure 6.

The milker should stand on the side of the cow before placing the teat cup. The paws are held in the palm of one hand. The stainless steel part of the claws is up and all nipple inlets are down. Then push up on the sealing band seat under the teat so that the vacuum in the large teat tube is centered on the teat paws and teat cup liner. With the other hand, quickly pull the teat cups one by one over the teat, as shown in Figure 7.

Milking should be done with a stable vacuum, as shown in Figure 8. While you are done, apply pressure on the paws with your hands and press a few times to complete the milking, as shown in Figure 8. Figure 9. Then hold the paw in the palm and pull the sealing tape seat down to cut off the vacuum in the paw and the teat cup. Therefore, the teat cup will come off automatically. As shown in Figure 10. Finally, sterilize the nipple with a sanitizer as shown.

- After expressing, place the cluster by hand on the hook of the machine, lift the lid of the milk bucket, spill the milk inside, and proceed to the next milking.
Cleaning and disinfection of milking machines:
- Cover the bucket head in time after milking. Rinse the dirt off the cluster with clean water (see Figure 12), then place the clean cluster in another bucket with hot water or disinfectant. Start the milking machine to work and wash it a few more times. Clean clusters, milk buckets and milk tubes. Finally rinse again with clean water until residual disinfectant

- After the milking cart has been used for a week, all the milk claws, milk buckets and cluster should be removed and thoroughly cleaned with a brush.
Inspection and Maintenance:
- Change the lubricating oil after the reducer is used for 750 hours (30" gear oil, 0.4kg)
- Use a certain amount of edible oil or 20# gear oil to lubricate the disc between the piston and the pump casing in the piston pump every week. Pull out the hose in the piston pump and pour the il into it.
- There are two sets of milk cup liner, which can be replaced to prolong the service life. It takes about one month to replace. Replace the liner in a cool place to prolong the life of the latex. Then use another liner. Before using the liner, it should be checked. If flaws and deformations appear, the pads will need to be replaced with new ones.
- For all kinds of harmless latex tubes, if they are found to be defective, they should be replaced in time.
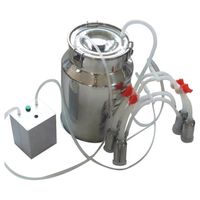
- Bucket material: 304 stainless steel
- Working vacuum: 0.04-0.05MPa (adjustable)
- Pulse frequency: 64 times/min
- Installed power: 0.55KW
- Motor speed: 1440rmp/min
- Motor voltage: 110V or 220V
- Milking bucket: 25L
- Working capacity: 10-12 cows/hour
- Staff required for milking: one
- Number of milking cup groups: one set
- Number of stainless steel milk buckets: one (capacity 25kg)


-
Low price 10L fully automatic cow and goat milking machine portable electric cow and goat milking machine special price
-
Portable milking machine/cow milking machine for sale
-
50L stainless steel receiving unit for dairy equipment
-
German wholesale price cow milking machine for sale
-
SS 304 Vacuum Pump Different Cow Goat Position Custom Electric Gasoline Engine Bucket Milking System
-
7L 14L Small Bucket/Water Tank Cow Goat Rechargeable 12V Battery Electric Motor Milking Machine
-
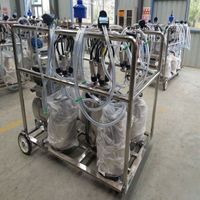
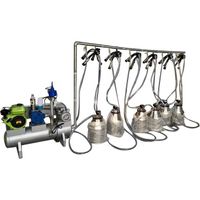
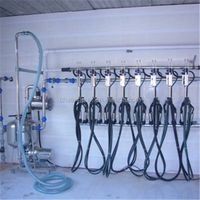
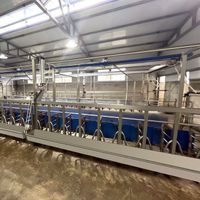
Simple Dairy Farm Milking Parlor System
-
stainless steel milk bucket
-
High quality small household adjustable speed rechargeable portable cow and sheep milking machine
-
Parallel automatic dairy equipment assembly line goat milking parlor system
Other Products
-
$69.00 - $109.00 / set
-
$102.33 - $173.69 / set
-
$649.00 - $749.00 / set
-
$89.00 - $102.00 / set
-
$785.00 - $942.00 / set
-
$611.00 / set
-
$139.00 / set
-
$869.00 / set
-
$96.00 / set
-
$57.00 / set